


Control Arduino With WiFi
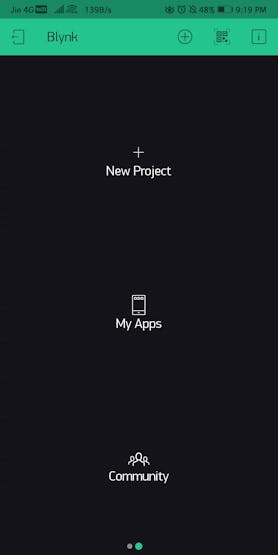
Step 1:Download the Blynk App from iOS or Google playAfter logging into the app either via a new account or with your Facebook account, you will see
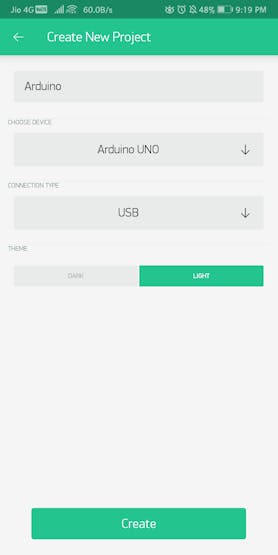
3. Tap New project to Create a New Project and choose your device, connection type and tap Create.
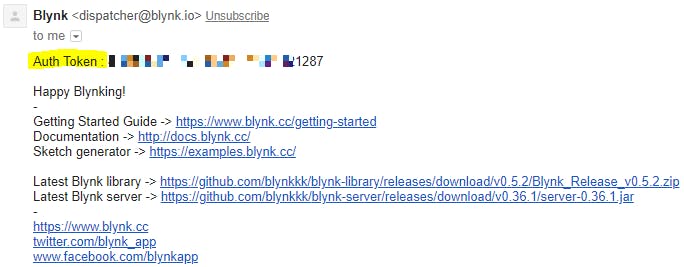
This will send a Auth Token to your registered email address. You will need this to connect the App with the device.
This will send a Auth Token to your registered email address. You will need this to connect the App with the device.
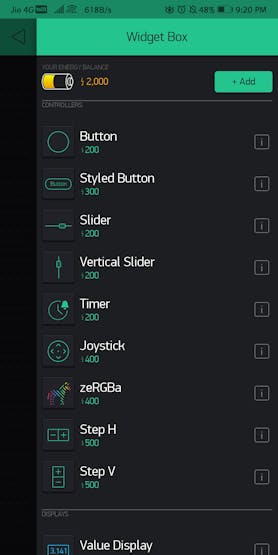
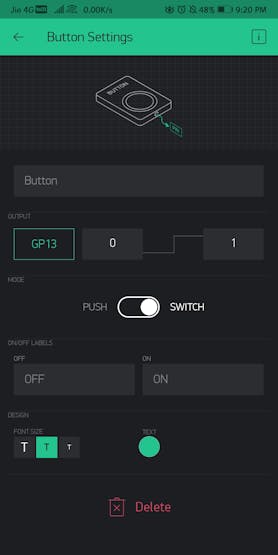
Authorization code for the project created4. Once ready, add widgets from the widgets box to start creating your project.As per the team, Blynk runs on Energy indicated by the battery. For new accounts, you get 2000 energy points and when you run out of energy you can buy more.
Authorization code for the project created
4. Once ready, add widgets from the widgets box to start creating your project.
cated by the battery. For new accounts, you get 2000 energy points and when you run out of energy you can buy more.
3 / 4
. Now head over to the Blynk examples site and make your selection as per what you chose in the app to generate the code and upload to your device. Add your Auth Token to complete the code.Step 2
- Blynk Libraries are to be installed manually. Download the latest release.zip file from Github.
- Unzip this file and copy all contents to the Libraries folder of the Arduino IDE.
Step 3
- Devices need to talk to Blynk Cloud to run the instructions.
- Create a new Sketch and paste the example code to write to the device. Ensure the Device, its connection type is selected appropriately.
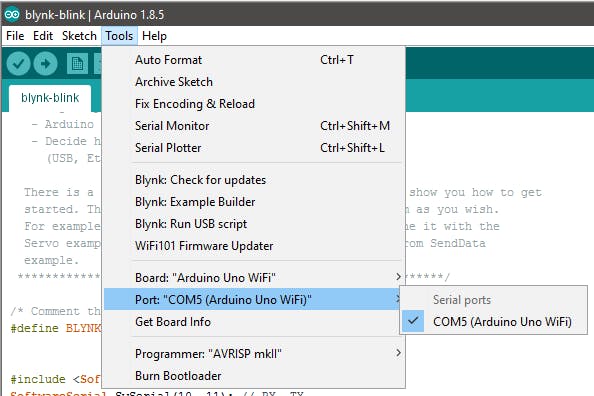
Check your Board, Connection and the COM port
4. In our example using USB as the connection type, you will need to ensure the device is able to connect to the Blynk Cloud by running a server script.
5. For Windows users, you can run the blynk-ser.bat with the correct COM port as per the instruction here.
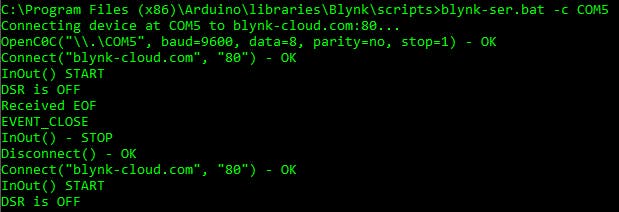
blynk-ser running
6. Once the script is ready, you can now run the project by clicking on the play icon.
7. You will now see the message that the project is connected and that your device is now ready.8. Once the project is running, the switch label is changed to OFF. Tap the button to see the LED turning ON and OFF every time you change its state.
Congratulations on completing your first project. This is the simplest project I could think to encourage beginners to start using with what minimum they have — Arduino+Blynk.Happy to get your comments to write more on such topics.
Thanks So much PcbWay
- Comments(0)
- Likes(0)
 More by Raushan Kumar
-
 How to Make Google Home Assistant Control LED Strip Light at Home
Introduction: How to Make Google Home Assistant Control LED Strip Light at HomeHey Guy’sIn this vide...
How to Make Google Home Assistant Control LED Strip Light at Home
Introduction: How to Make Google Home Assistant Control LED Strip Light at HomeHey Guy’sIn this vide...
-
 Breadboard Friendly Breakout Board for ESP8266
Introduction: Breadboard Friendly Breakout Board for ESP8266-01 With Voltage RegulatorHello everyone...
Breadboard Friendly Breakout Board for ESP8266
Introduction: Breadboard Friendly Breakout Board for ESP8266-01 With Voltage RegulatorHello everyone...
-
 Weather Station Using Esp32
For my first IoT project I wanted to build a Weather Station and send the data to data.sparkfun.com....
Weather Station Using Esp32
For my first IoT project I wanted to build a Weather Station and send the data to data.sparkfun.com....
-
 Simple Motion Sensor Light! (PIR)
Step 1: Gather the PartsOne can Buy Everything Used in this Project from Ebay.While i Get most of th...
Simple Motion Sensor Light! (PIR)
Step 1: Gather the PartsOne can Buy Everything Used in this Project from Ebay.While i Get most of th...
-
 Smartphone Holder ! PCBWAY!
Our ANTiDISTRACTION device is aimed at terminating all forms of cellular distraction during periods ...
Smartphone Holder ! PCBWAY!
Our ANTiDISTRACTION device is aimed at terminating all forms of cellular distraction during periods ...


