


How to Make Google Home Assistant Control LED Strip Light at Home
Introduction: How to Make Google Home Assistant Control LED Strip Light at Home

Hey Guy’s
In this video you’ll Get to know How to Make Google Home Assistant Control LED Strip light using NodeMCU
Its NodeMCU control and Google Home ControlBased project, you can also work with this help of contol RGB LED Strips for your Gaming setup and Room setup .
This is a really awesome project totally made at home.
I Hope you enjoy my this Instructable 1st Project and for more detailed please watch my YouTube Channle .
Thank you for your time...
Follow My Video :
Supplies:
Part of List:
1)NodeMcu
2)wsp8266 LED Strip
3) Dc Connector
4) Wrie
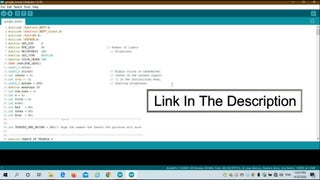
Code Link- https://bit.ly/3bua79O
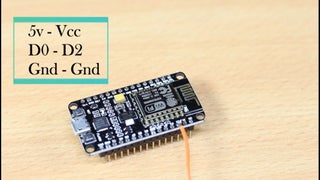
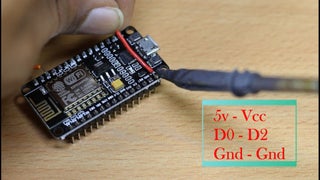
Step 1: Step 1 : NodeMCU ESP8266

Hey Guys ,
NodeMCU ESP8266 Its mainly part of this project for making a wonderful project for your Gamaing set up so Its Programming based project but not a hard work its so easy and just a 5 Minuets project .
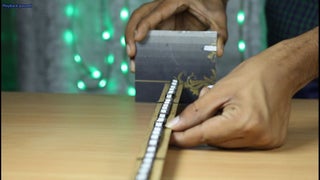
Step 2: Step : 2 ESP8266 LED STRIP
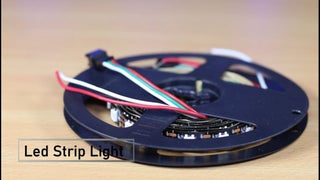
This LED strip you can used in NodeMCU ESP8266 And Arduino but i have used in this project with NodeMCU ESP8266 ,
Guys any other problem for making this project please check for this project video on my YouTube Channel .
Step 3: Step : 4
Step 4: Step : 4
Step 5: Step :5
Step 6: Step : 6 Codeing NodeMcu

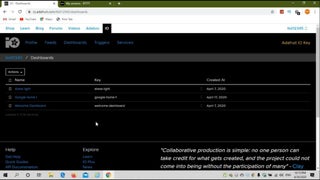
Step 7: Step : 7 Adafruit
Step 8: Step : 8 IFTTT

Step 9: Step : 9
Step 10: Step : 10 Supply

Done
THANKS PCBWay
❤️
- Comments(0)
- Likes(1)
 More by Romeo Hackster
-
 How to Make Google Home Assistant Control LED Strip Light at Home
Introduction: How to Make Google Home Assistant Control LED Strip Light at HomeHey Guy’sIn this vide...
How to Make Google Home Assistant Control LED Strip Light at Home
Introduction: How to Make Google Home Assistant Control LED Strip Light at HomeHey Guy’sIn this vide...
-
 Breadboard Friendly Breakout Board for ESP8266
Introduction: Breadboard Friendly Breakout Board for ESP8266-01 With Voltage RegulatorHello everyone...
Breadboard Friendly Breakout Board for ESP8266
Introduction: Breadboard Friendly Breakout Board for ESP8266-01 With Voltage RegulatorHello everyone...
-
 Weather Station Using Esp32
For my first IoT project I wanted to build a Weather Station and send the data to data.sparkfun.com....
Weather Station Using Esp32
For my first IoT project I wanted to build a Weather Station and send the data to data.sparkfun.com....
-
 Simple Motion Sensor Light! (PIR)
Step 1: Gather the PartsOne can Buy Everything Used in this Project from Ebay.While i Get most of th...
Simple Motion Sensor Light! (PIR)
Step 1: Gather the PartsOne can Buy Everything Used in this Project from Ebay.While i Get most of th...
-
 Smartphone Holder ! PCBWAY!
Our ANTiDISTRACTION device is aimed at terminating all forms of cellular distraction during periods ...
Smartphone Holder ! PCBWAY!
Our ANTiDISTRACTION device is aimed at terminating all forms of cellular distraction during periods ...


