


|
|
Raspberry Pi |
x 1 | |
|
|
Ultrasonic Sensor |
x 1 | |
|
|
Servo Motor |
x 1 | |
|
|
PWM Driver |
x 1 |

|
Thonny IDE |
|
|
|
Raspbian OS |
|

|
Python |
Raspberry Pi + Servo Motor + Ultrasonic Sensor
Hello!
We have prepared a small tutorial with Raspberry Pi + Ultrasonic
Sensor + Servo Motor. I would try another Raspberry Pi application for
beginners; I looked among the pieces I had at my disposal, and found something
interesting; I searched the internet for information about the parts I have,
how to control them individually, and now I will try to combine them to make an
application for learning purposes.
Components used in this project:
- Raspberry Pi;
- Ultrasonic Sensor HC SR-04;
- Servo Motor SG90;
- PCA9685 PWM Driver.
The first step is to install a library, which will help us use
the PWM driver PCA9685 (Figure 1), useful to control a servomotor, an LED or a
dc motor. Information can be found at this link:
https://learn.adafruit.com/adafruit-16-channel-servo-driver-with-raspberry-pi/using-the-adafruit-library.

Figure 1
We start by opening Terminal Window and writing the command:
sudo pip3 install
adafruit-circuitpython-servokit
We are waiting for the package installation to be completed.
The control of the SG 90 servomotor (Figure 2) is easy, we only
need a few program lines written in Thonny IDE:
from
adafruit_servokit import ServoKit
kit = ServoKit
(channels = 16)
We import and initialize the ServoKit class.
Then, to move the actuator to an angle we want, we add the
command:
kit.servo [0] .angle
= 0

Figure 2
The HC SR-04 ultrasonic sensor (Figure 3) is affordable, easy to
use at 5V.

Figure 3
The electronic scheme according to which the connections are
made is the following:
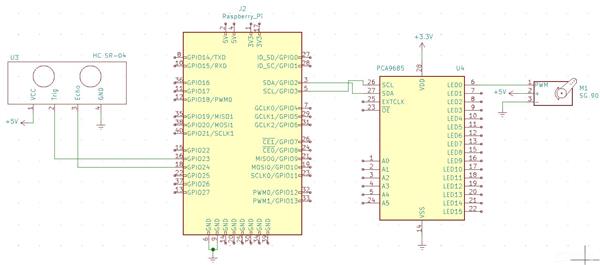
Figure 4
The servomotor is connected to channel 0 of PCA9685; a supply
voltage of 5V is required for the servomotor and the ultrasonic sensor, and a
3.3V for the logic circuit of the PCA9685; PCA9685 driver, SDA and SCL pins
connect SDA and SCL pins on the Raspberry Pi (physical pins 3 and 5); for the
ultrasonic sensor, the Trig pin -> GPIO23 (physical pin 16) and Echo ->
GPIO24 (physical pin 18).
Practical realization of the project (Figure 5):

Figure 5
The distance is displayed in centimeters, with two decimals, the
program is run in Thonny Python (Figure 6):

Figure 6
Thanks to the PCBWay team for this activity!
We expect as much from you!
Success!

Raspberry Pi + Servo Motor + Ultrasonic Sensor


Raspberry Pi 5 7 Inch Touch Screen IPS 1024x600 HD LCD HDMI-compatible Display for RPI 4B 3B+ OPI 5 AIDA64 PC Secondary Screen(Without Speaker)
BUY NOW


- Comments(0)
- Likes(1)
 More by cris 🙂
-
 Dynamic decoration with LEDs and more
Hello everyone!As you can see in the title, we have a circuit with LEDs, many LEDs, it's a 4x4 LEDs ...
Dynamic decoration with LEDs and more
Hello everyone!As you can see in the title, we have a circuit with LEDs, many LEDs, it's a 4x4 LEDs ...
-
 LEDs Stars
Hello everyone! I'm signing up for this competition with a small project designed to attract your a...
LEDs Stars
Hello everyone! I'm signing up for this competition with a small project designed to attract your a...
-
 Audio amplifier with LM386 (and BASS boost)
Hello everyone!Circuit descriptionThe LM386 is quite a ve...
Audio amplifier with LM386 (and BASS boost)
Audio amplifier with LM386 (and BASS boost)Hello everyone!Circuit descriptionThe LM386 is quite a ve...
-
 Audio amplifier 25W TDA2030
A fairly well-known and interesting montagePresentationThe presented audi...
Audio amplifier 25W TDA2030
Audio amplifier 25W TDA2030A fairly well-known and interesting montagePresentationThe presented audi...
-
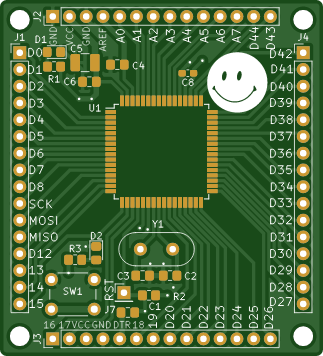
 Raspberry Pi Pico Expansion Board
Hello everyone!UPDATE!!!I made some changes, routing in particular, and freed up the board of a few ...
Raspberry Pi Pico Expansion Board
Hello everyone!UPDATE!!!I made some changes, routing in particular, and freed up the board of a few ...
-
 Adjustable voltage power supply
Among the most important electronic devices in the electronics laboratory is the voltage source. Thi...
Adjustable voltage power supply
Among the most important electronic devices in the electronics laboratory is the voltage source. Thi...
-
 Digital Clock with AT89C2051
Circuit OperationShort SW2 presses cycle through displaying the current time in HH:MM and MM:SS form...
Digital Clock with AT89C2051
Circuit OperationShort SW2 presses cycle through displaying the current time in HH:MM and MM:SS form...
-
 Switch based light sensor
Hi!The circuit shown can be used to turn on the light in the garden, or some light panels / advertis...
Switch based light sensor
Hi!The circuit shown can be used to turn on the light in the garden, or some light panels / advertis...
-
 LM3909 flashing indicator
I present to you a circuit which is a little outdated, but quite pleasant for some, I saw that this ...
LM3909 flashing indicator
I present to you a circuit which is a little outdated, but quite pleasant for some, I saw that this ...
-
 Hexagonal Panel with WS2812B LEDs
Hi makers!I created a hexagonal PCB with many WS2812B LEDs, 144 in total, for which I thought of pla...
Hexagonal Panel with WS2812B LEDs
Hi makers!I created a hexagonal PCB with many WS2812B LEDs, 144 in total, for which I thought of pla...
-
 ESP01S Minimal Board
Hi makers!I created this small PCB for ESP01S because before I was using a DIY version and then I bo...
ESP01S Minimal Board
Hi makers!I created this small PCB for ESP01S because before I was using a DIY version and then I bo...
-
 4x4x4 cube with blue LEDs
Hi makers!I know that these days there are many variations of LEDs, for example SMDs are smaller and...
4x4x4 cube with blue LEDs
Hi makers!I know that these days there are many variations of LEDs, for example SMDs are smaller and...
-
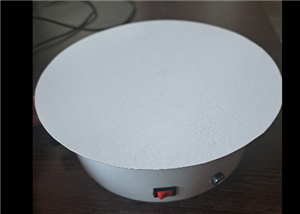 Low cost turntable 😁
Hi makers!I'm entering this competition with a small project that I've wanted to make for some time,...
Low cost turntable 😁
Hi makers!I'm entering this competition with a small project that I've wanted to make for some time,...
-
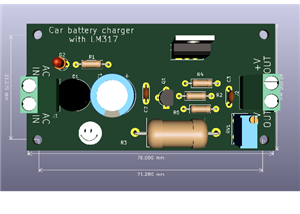 A DIY charger for 12V battery
Hello everyone!I present to you a project that really didn't reach its final state, until recently. ...
A DIY charger for 12V battery
Hello everyone!I present to you a project that really didn't reach its final state, until recently. ...
-
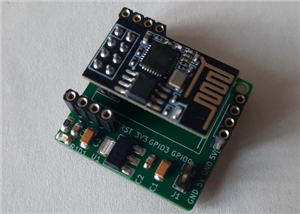 ESP01 board
Hello PCBWayers!You probably know that ESP01S/01 boards can be a little difficult to use in an easie...
ESP01 board
Hello PCBWayers!You probably know that ESP01S/01 boards can be a little difficult to use in an easie...
-
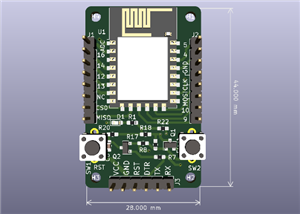 ESP12F Board
Hello makers!Some time ago I had a shopping coupon and I thought about making some simple PCBs with ...
ESP12F Board
Hello makers!Some time ago I had a shopping coupon and I thought about making some simple PCBs with ...
-
 ATMega32 Board
Hi !I remembered this simple project I made for myself, you can use it with an ATMega32 or ATMega16 ...
ATMega32 Board
Hi !I remembered this simple project I made for myself, you can use it with an ATMega32 or ATMega16 ...
-
 AT90CAN128
Hello makers!Here is a guy who likes to build various, small, electronic circuits, and through this ...
AT90CAN128
Hello makers!Here is a guy who likes to build various, small, electronic circuits, and through this ...
-
Programmable Mist Maker - XIAO / QT PY Extension
1060 2 1 -
RadioHAT - Raspberry Pi radio development platform
858 0 2 -
-
-
-
-
ARPS-2 – Arduino-Compatible Robot Project Shield for Arduino UNO
3320 0 6 -
A Compact Charging Breakout Board For Waveshare ESP32-C3
3926 3 8 -
AI-driven LoRa & LLM-enabled Kiosk & Food Delivery System
4314 2 2


