PCBWay Community
Search title or content
Search
PCBWay
PCB Instant Quote
CNC | 3D Printing
Login
Sign Up
More Notifications
No notifications.
My Profile
My projects
My Likes
My Deals
My Goods for Bazaar
Settings
Sign Out
Projects
Categories
DIY Electronics
Arduino
Hardware
Audio
Computers & USB
Breakout Board Projects
Home Automation
LED Displays & Matrices
IoT
Robotics
View all categories
By Source Files
Onju Voice - AI assistant replacement to Google Nest Mini by @justLV
LogicAnalyzer V6.0
DIY 1kW Open Source MPPT Solar Charge Controller
Tad Boy Color
SummerCart64 - a fully open source N64 flashcart
kv4p HT v1.7b
QuinLED-Dig-Uno
Bike Fingerprint - PCB
Arduino RC engine sound & light controller with inertia simulation for ESP32
Solar Powered WiFi Weather Station V2.0
Frog Boy Color
SIDKick pico 0.2 (SID 6581/8580-replacement for C64/C128)
View all source files projects
Featured Projects
Onju Voice - AI assistant replacement to Google Nest Mini by @justLV
LogicAnalyzer V6.0
DIY 1kW Open Source MPPT Solar Charge Controller
Featured
Source Files
Video
View all projects
Questions
Sponsorships
Feedback
Blog
Store
PCB Design
Contest
- 2026 KiCad PCB Design Contest
- 8th Project Design Contest
- 7th Project Design Contest
- KiCad Design Contest
- 6th Project Design Contest
- 5th PCB Design Contest
- 4th PCB Design Contest
- Raspberry Pi Pico Contest
- PCB Design Tutorial
- 3rd PCB Design Contest
- I CAN SOLDER Kit Contest
- 2nd PCB Design Contest
- 1st PCB Design Contest
Add questions
Create a project
Please verify your email address so that you can enjoy our more comprehensive services.
Wearables
Weather
All categories
DIY Electronics
Arduino
Hardware
Audio
Computers & USB
Breakout Board Projects
Home Automation
LED Displays & Matrices
IoT
Robotics
3D Printing
Blinkenlights
Calculator
Camera
Clocks
CNC
Educational
Automotive
Electronic Games
ESP32
Fabrication Tools
Flight
Guitar
Keyboards
Misc
Music
Nixie Tube
Oscilloscope
Particle
Power Supply
Programmable Logic Projects
Raspberry Pi
Radio
Retro Stuffs
Space & Satellite
Sensors
Software
Synthesizer
Ultrasonic
Virtual Reality
Wearables
Weather
Project by top creative fields
All categories
3D Printing
Arduino
Audio
Automotive
Blinkenlights
Breakout Board Projects
Calculator
Camera
Clocks
CNC
Computers & USB
DIY Electronics
Educational
Electronic Games
ESP32
Fabrication Tools
Flight
Guitar
Hardware
Home Automation
IoT
Keyboards
LED Displays & Matrices
Misc
Music
Nixie Tube
Oscilloscope
Particle
Power Supply
Programmable Logic Projects
Radio
Raspberry Pi
Retro Stuffs
Robotics
Sensors
Software
Space & Satellite
Synthesizer
Ultrasonic
Virtual Reality
Wearables
Weather
View all categories
Share & Discover
All tags
Audio
Arduino
3D printing
Board
LED
Calculator
Create a project
Sort by : Trending
Trending
Score
Likes
Views
Discuss
Newest
Featured
Source Files
3D Design
Video
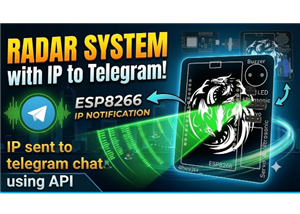
# ESP8266 Radar System - Complete Documentation---## 1. Project OverviewThis is an ESP8266-based Radar System that uses an ultrasonic sensor (HC-SR04) to detect objects and display them on a real-time...
Radar System
45
0
0
Heymant Visaakan J
Heymant Visaakan J
INDIA
0
0
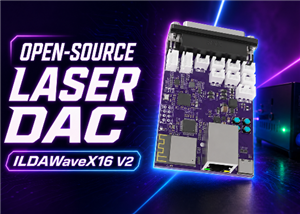
IntroductionILDAWaveX16 V2 is an open-source, high-resolution laser DAC for laser enthusiasts. Built around a dual-processor ESP32-S3 + RP2354 architecture, it combines standard ILDA DB25 output, dire...
ILDAWaveX16 V2
79
1
0
StanleyProjects
StanleyProjects
SLOVAKIA
28
0
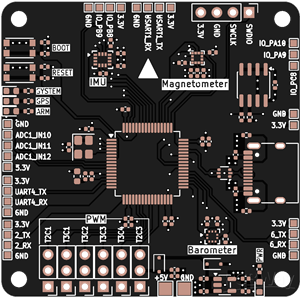
Custom flight controller board built around the STM32F722RET6 (LQFP-64), designed as a from scratch alternative to commercial ArduPilot compatible boards. I wanted full control over the peripheral map...
STM32F722RET6 Flight Controller V2
36
0
1
Kavindu Chamath
Kavindu Chamath
SRI LANKA
0
0
This board is the power backbone of a mobile robot developed as my final-year engineering thesis. It takes a 34 V two-cell battery pack and generates regulated 12 V and 5 V rails using TDK-Lambda i6A4...
_PWR- share
58
0
0
Engineer
Engineer
BOSNIA AND HERZEGOVINA
0
0
1 Megabyte ram disk for TRS-80 Model 100 and Kyotronic KC-85Re-implementation of Node Systems DATAPAC / RAMPAC in a DIP-40 form factor.https://github.com/bkw777/NODE_DATAPAC/Drver softwarehttps://gith...
MiniNDP u1M - 1M RAMdisk for TRS-80 Model 100 & Kyotronic KC-85
72
0
0
Brian K. White
Brian K. White
UNITED STATES OF AMERICA
25
0
Build a 1kW 80V 30A WiFi MPPT Solar Charge Controller, equipped with a phone app datalogging telemetry! (available on Android & IoS) The design has been intensively tested for months and has been ...
DIY 1kW Open Source MPPT Solar Charge Controller
119589
83
167
Angelo Casimiro
Angelo Casimiro
JAPAN
483
0
UPDATE Jan 25, 2025:This design is now obsolete. Please use v1.8 instead which has far better transmit power and receive sensitivity, and fits more ESP32 dev boards! Find it here:kv4p HT v1.8a (1" wid...
kv4p HT v1.7b
33349
32
48
Vance Vagell
Vance Vagell
UNITED STATES OF AMERICA
52
0
A Miniature CPU built in LibrePCB
alu-no-cpu-v1
60
1
0
Engineer
Engineer
UNITED STATES OF AMERICA
0
0
This project is about a Commodore PLA replacement.PLA replacements for the Commodore 64 are available for quite a number of years and have grown increasingly sophisticated. Therefore you may ask why t...
Commodore 64 PLA replacement
30635
13
114
Daniël Mantione
Daniël Mantione
NETHERLANDS, THE
110
5
The QuinLED-Dig-Uno is a single channel ESP32 (v3 not suited for ESP8266) based addressable LED controller! Perfectly runs WLED or ESPixelstick firmware and easily integrates with MQTT and Home Assist...
QuinLED-Dig-Uno
60410
6
120
Quindor
Quindor
NETHERLANDS, THE
304
0
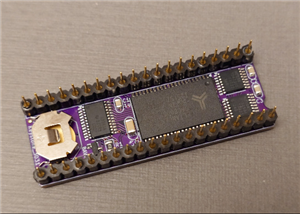
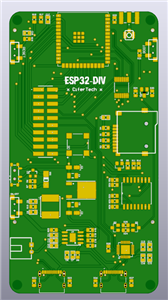
CipherTech Full files upload for the PCB.USE THIS FILE ONLY.
ESP32DIV2-Gerber
31
0
0
Engineer
Engineer
AUSTRALIA
0
0
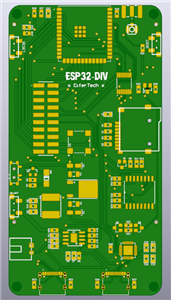
Main PCB Board for ciphertechs github repo
ESP32DIV2-Gerber
18
0
0
Engineer
Engineer
AUSTRALIA
0
0
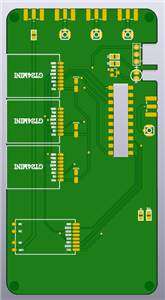
ESP32 Shield device from Ciphertech Repo.
ESP32DIV2-Shield-Gerber
19
0
0
Engineer
Engineer
AUSTRALIA
0
0
You've probably heard of FreeTocuhDeck. You haven't? Go check it out: https://www.youtube.com/watch?v=soIGV6BszcMWhen I was designing FreeTouchDeck, I quickly ran in to issues when using a breadboard....
ESP32 TFT Combiner V1
28138
14
32
Dustin Watts
Dustin Watts
NETHERLANDS, THE
52
4
The QuinLED-Dig-Quad is a Quad channel ESP32 (ESP8266 dropped since v3!) based addressable LED controller! Perfectly runs WLED or ESPixelstick firmware and easily integrates with MQTT and Home Assista...
QuinLED-Dig-Quad
33032
17
67
Quindor
Quindor
NETHERLANDS, THE
304
0
ESP32 Communication Board — Undergraduate Thesis ProjectI'm designing the communication and control board for a mobile robot as my final-year engineering thesis. It's built around an ESP32-C5-WROOM-1 ...
COMM-share
67
0
0
Engineer
Engineer
BOSNIA AND HERZEGOVINA
0
0
1
2
3
4
5
6
7
8
9
10
11
...