


How to Make a 12V Lead Acid Battery Charger with CC & CV
I made a simple battery charger for charging my 12V/7Ah SLA battery commonly used inside the UPS for desktop computers. The circuit is based on the linear regulator LM317.
The charger charges the battery in constant current and constant voltage mode. Initially, it charges in constant current mode and then moves to constant voltage mode.
How It Works ?

The input AC mains voltage is stepped down to a lower voltage ( 12-15V ) by using a step-down transformer. Then the low-voltage AC is rectified to get DC voltage by the bridge rectifier circuit consisting of 4 diodes D1, D2, D3, and D4. Then the DC voltage is filtered through the input filter capacitors C1 and C2.
The filtered DC voltage is given to the input of regulator LM317, the out voltage from it is decided by the values of two resistors R1 and R2. This voltage is the charger setpoint to terminate the charge cycle.
Vout = 1.25 x ( 1 +R2/R1 )
Here I have used R1= 1K and R2 = 10K
So Vout = 1.25 x ( 1 + 10/1 ) = 1.25 x 11 = 13.75V
The output voltage from the LM317 is again filtered through the output filter capacitor C3.
The charging current is decided by the resistor R3. I have used a 0.47Ohm / 2W resistor for setting the charging current to 500mA. However, you can reduce its value for a higher charging current. But remember not to go beyond 1.2A, otherwise, the LM317 may be damaged.
As the current through the resistor R3 goes above 500mA, the transistors Q1 and Q2 conduct, and the voltage across the resistor will increase. However, the regulator LM317 not let it happen, and the voltage slowly decreases and falls into the constant current mode.
When the charging current is low, the transistors Q1 and Q2 are in the cut-off mode, so the output voltage remains constant.
The MOSFET Q3 disconnects the charger until it is connected to the AC Mains.
The OPAMP circuit is used for LED indication when the charge cycle terminates.
Testing the Charger

To test the charger, you need a step-down transformer with a secondary voltage in the range of 12-16V. Here I have used a 220/16V transformer for the demonstration. Connect the low-voltage terminals of the transformer to the AC input screw terminal on the PCB board.
Connect the battery with the battery screw terminal on the PCB. Be sure you are connecting to the correct polarity. The polarity is marked on the PCB. This charger has no reverse polarity protection, if you connect the battery in the wrong direction, it will be damaged.

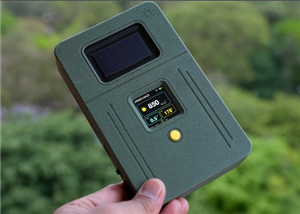
After the connection of the transformer and battery with the charger PCB, connect the primary ( HV side ) of the transformer to the AC mains. The charger LED will immediately turn ON, it indicates the charger is charging the battery. You can check the charging voltage and current by using a multimeter. I have used my multimeter to measure the charging voltage and my clamp meter to measure the charging current.
In the initial stage of charging, the charger current remains constant ( approx. 500mA ) but at the end of the charge cycle, it enters into the constant voltage ( 13.75V ). When the charging current is very low, the LED will turn OFF, indicating that the battery is fully charged. Now you can disconnect the battery from the AC mains.
How to Make a 12V Lead Acid Battery Charger with CC & CV
*PCBWay community is a sharing platform. We are not responsible for any design issues and parameter issues (board thickness, surface finish, etc.) you choose.


Raspberry Pi 5 7 Inch Touch Screen IPS 1024x600 HD LCD HDMI-compatible Display for RPI 4B 3B+ OPI 5 AIDA64 PC Secondary Screen(Without Speaker)
BUY NOW


- Comments(8)
- Likes(10)
- 1 USER VOTES
- YOUR VOTE 0.00 0.00

-
9design
-
9usability
-
8creativity
-
6content
More by Open Green Energy
-
 DIY Smart Multipurpose Battery Tester
In recent years, the market has been flooded with low-cost batteries, many of which originate from u...
DIY Smart Multipurpose Battery Tester
In recent years, the market has been flooded with low-cost batteries, many of which originate from u...
-
 Solar Powered WiFi Weather Station V4.0
This is an affordable weather station for various applications like smart agriculture, smart city, s...
Solar Powered WiFi Weather Station V4.0
This is an affordable weather station for various applications like smart agriculture, smart city, s...
-
 DIY Solar Bottle Lamp V1.0
Solar Bottle Lamp is a solar-powered light that is constructed from waste plastic bottles. The desig...
DIY Solar Bottle Lamp V1.0
Solar Bottle Lamp is a solar-powered light that is constructed from waste plastic bottles. The desig...
-
 https://www.instructables.com/DIY-Solar-Power-Meter/
Accurate measurement of solar irradiance is one of the most critical steps in solar photovoltaic sys...
https://www.instructables.com/DIY-Solar-Power-Meter/
Accurate measurement of solar irradiance is one of the most critical steps in solar photovoltaic sys...
-
 DIY Solar Mason Jar Lamp
Making a solar mason Jar Lamp is not just a fun project; it’s also a fantastic way to learn about re...
DIY Solar Mason Jar Lamp
Making a solar mason Jar Lamp is not just a fun project; it’s also a fantastic way to learn about re...
-
 LED PCB for DIY Solar Bottle Lamp V2.0
DIY Solar Bottle Lamp V2.0 contains two PCBs, one is the Main PCB and the other is the LED PCB.This ...
LED PCB for DIY Solar Bottle Lamp V2.0
DIY Solar Bottle Lamp V2.0 contains two PCBs, one is the Main PCB and the other is the LED PCB.This ...
-
 DIY Portable Solar Generator V2
A DIY portable solar generator is an excellent project for individuals who want to harness the power...
DIY Portable Solar Generator V2
A DIY portable solar generator is an excellent project for individuals who want to harness the power...
-
 DIY 18650 Power Bank With Flashlight
BOM :Powerbank Module: https://s.click.aliexpress.com/e/_DBELYV918650 Battery: https://s.click.aliex...
DIY 18650 Power Bank With Flashlight
BOM :Powerbank Module: https://s.click.aliexpress.com/e/_DBELYV918650 Battery: https://s.click.aliex...
-
 Solar WiFi Weather Station V4 Receiver ( Rx )
Note:One more important thing, both the transmitter and receiver board must be in the same frequency...
Solar WiFi Weather Station V4 Receiver ( Rx )
Note:One more important thing, both the transmitter and receiver board must be in the same frequency...
-
 DIY Solar Panel Monitoring System – V2.0
As solar photovoltaic (PV) systems become increasingly popular as a clean and renewable source of en...
DIY Solar Panel Monitoring System – V2.0
As solar photovoltaic (PV) systems become increasingly popular as a clean and renewable source of en...
-
 Main PCB for DIY Solar Bottle Lamp V2.0
PCBWay Note: DIY Solar Bottle Lamp V2.0 contains two PCBs, one is the Main PCB and the other is the ...
Main PCB for DIY Solar Bottle Lamp V2.0
PCBWay Note: DIY Solar Bottle Lamp V2.0 contains two PCBs, one is the Main PCB and the other is the ...
-
 How to Make a 12V Lead Acid Battery Charger with CC & CV
I made a simple battery charger for charging my 12V/7Ah SLA battery commonly used inside the UPS for...
How to Make a 12V Lead Acid Battery Charger with CC & CV
I made a simple battery charger for charging my 12V/7Ah SLA battery commonly used inside the UPS for...
-
 TP4056 Based Solar Bottle Lamp
Solar Bottle Lamp is a solar-powered light that is constructed from waste plastic bottles. The desig...
TP4056 Based Solar Bottle Lamp
Solar Bottle Lamp is a solar-powered light that is constructed from waste plastic bottles. The desig...
-
 DIY Mini UPS for WiFi Router V5.0
The pandemic COVID-19 outbreak forced companies to continue with work-from-home policy to maintain s...
DIY Mini UPS for WiFi Router V5.0
The pandemic COVID-19 outbreak forced companies to continue with work-from-home policy to maintain s...
-
 ESP8266 Weather Widget V2.0
Welcome to my new Weather Widget Project. Earlier I have posted an article on the weather widget, th...
ESP8266 Weather Widget V2.0
Welcome to my new Weather Widget Project. Earlier I have posted an article on the weather widget, th...
-
 DIY Non Contact IR Thermometer V1.0
Currently, we are chasing an invisible monster named Corona Virus ( COVID-19 ) and we are going thro...
DIY Non Contact IR Thermometer V1.0
Currently, we are chasing an invisible monster named Corona Virus ( COVID-19 ) and we are going thro...
-
 Solar Powered WiFi Weather Station V3.0
Note: now the version is 3.2 This Weather Station is such compact weather station that consists of s...
Solar Powered WiFi Weather Station V3.0
Note: now the version is 3.2 This Weather Station is such compact weather station that consists of s...
-
 DIY Emergency Light
Features:● Long Battery Backup ( 6V / 4.5Ah )● Light can bе соnnесtеd tо the power source аll t?mе.●...
DIY Emergency Light
Features:● Long Battery Backup ( 6V / 4.5Ah )● Light can bе соnnесtеd tо the power source аll t?mе.●...
-
Programmable Mist Maker - XIAO / QT PY Extension
404 0 0 -
RadioHAT - Raspberry Pi radio development platform
316 0 1 -
-
-
-
-
ARPS-2 – Arduino-Compatible Robot Project Shield for Arduino UNO
2867 0 6 -
A Compact Charging Breakout Board For Waveshare ESP32-C3
3370 3 8 -
AI-driven LoRa & LLM-enabled Kiosk & Food Delivery System
3689 2 2


