Summary: In this short post, we will see how to generate the files(Gerber files, Drill File, BOM file, and Footprint Position) needed to produce our PCBs in KiCad. After reading this post I would know how to export all the files to produce your PCBs with PCBWay!
Note:Now you can place order directly by PCBWay Plugin for KiCad
Have you made your first project in Kicad and now you want to produce some prototypes? In this short article, I will explain how to export the files needed to produce your first prototypes.
Here's how to easily generate Gerber files with KiCad. Follow all the steps very carefully.
Open KiCad>PCB Layout Editor(of your project)
Select: File>Plot...

This step of the tutorial is very important, pay close attention. You have to select all the layers necessary for the production of your PCBs. In this example, I am exporting a project with only two layers. So if your project has multiple layers be sure to select them all.

Now you can export the files by clicking on Plot!
In the screenshot shown below, I show where the button to select is located.

Now I'll explain how to export the Drill files. Just click on "Generate Drill Files", in the screenshot shown below I show where the button to select is located.

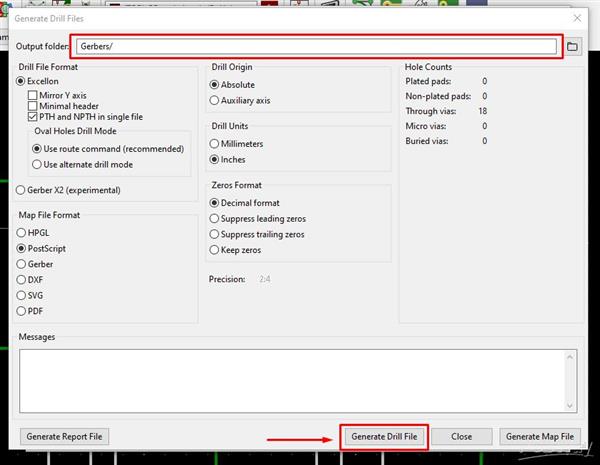
Now you just have to put all the generated files in a .zip archive.
PCBWay has developed this very useful tool(free software) to quickly check your Gerber files before placing your order.
Online Gerber Viewer: https://www.pcbway.com/project/OnlineGerberViewer.html
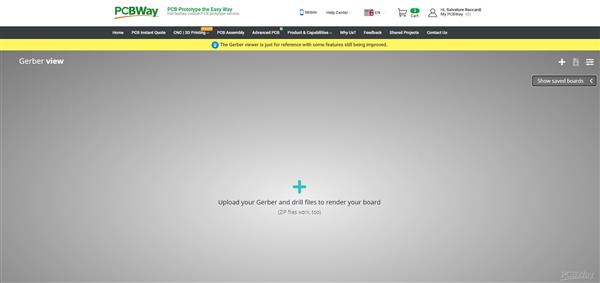
With this tool, you can see if all the layers of your project are there.
As you can see from the screenshot below, on the left there are all the layers of the project and you can decide via the eye icon whether to display the single element(silkscreen, copper, solder mask, etc.). At the top, you can select the layers you want to view.
Next to the project name at the top of the screen, you can view the view settings, with the possibility of modifying the render options and the colors of the relative layers.

You will be prompted for the BOM file when placing a PCB assembly order. This file (.csv), contains all the components list you used for your project.

It is possible to export the BOM file from the KiCad schematic layout editor.
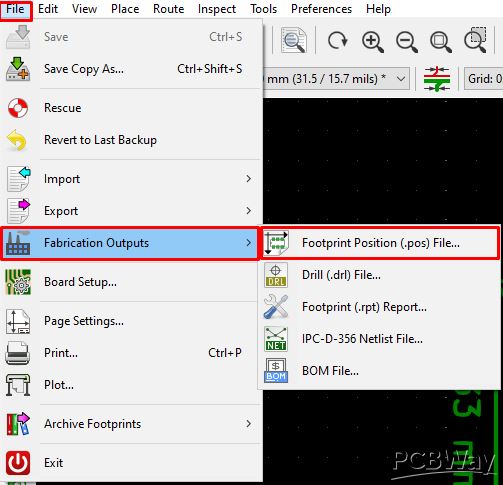
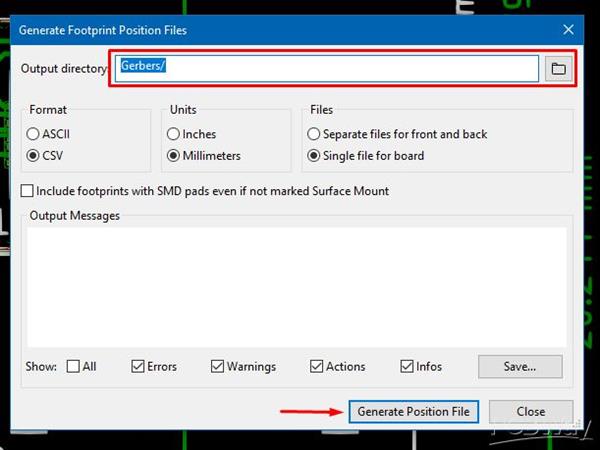
This type of file will be required if you decide to use the Assembly service offered by PCBWay. Now I'll explain how to export this file in .csv where you will find all the components present in your PCB with their coordinates.
Select: File>Fabrication Outputs>Footprint Position (.pos) File...
If you have any questions or concerns you can also ask, I will be happy to help you. I hope you found this short article useful!


