


|
|
Analog Voltmeter - 5V DCHUA
|
x 16 | |
|
|
Pca9685pw 16 channel 12-bit pwm/servo Driver-I2C |
x 1 | |
|
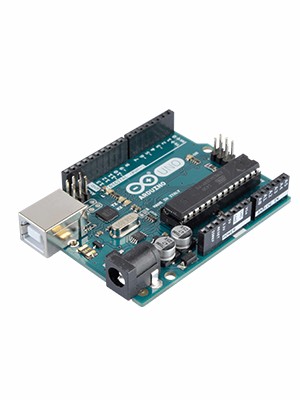
ARDUINO UNO REV3 |
x 1 | |

|
Raspberry Pi Pico |
x 1 |

|
arduino IDEArduino
|
|

|
Thonny Python |
|

|
fritzing |
Simple Electronics to Escape Room Owners - Using a bunch of voltmeters with PCA9685
This is a preliminary study for an Escape Room game. My main goal was to add as many analog displays as possible, without having to use a lot of digital outputs. This tutorial is just a demonstration of how to use the PCA 9685 module for various types of PWM outputs, including a DC voltmeter.
I discovered this module with the folks at Adafruit and its description on the website says it all:
You want to make a cool robot, maybe a hexapod walker, or maybe just a piece of art with a lot of moving parts. Or maybe you want to drive a lot of LEDs with precise PWM output. Then you realize that your microcontroller has a limited number of PWM outputs! What now? You could give up OR you could just get this handy PWM and Servo driver breakout.
When we saw this chip, we quickly realized what an excellent add-on this would be. Using only two pins, control 16 free-running PWM outputs! You can even chain up 62 breakouts to control up to 992 PWM outputs (which we would really like to see since it would be glorious)
- It's an I2C-controlled PWM driver with a built-in clock. That means that, unlike the TLC5940 family, you do not need to continuously send it signal tying up your microcontroller, it's completely free running!
- It is 5V compliant, which means you can control it from a 3.3V microcontroller, with 3.3V logic pull-ups, and still safely sink up to 5.5V outputs (this is good for when you want to control common-anode white or blue LEDs with 3.4+ forward voltages)
- 6 address select pins so you can wire up to 62 of these on a single i2c bus, a total of 992 outputs - that's a lot of servos or LEDs
- Adjustable frequency PWM up to about 1.6 KHz
- 12-bit resolution for each output - for servos, that means about 4us resolution at 60Hz update rate
- Configurable push-pull or open-drain output
- Output enable pin to quickly disable all the outputs
I watched this excellent video from Electronoobs and in one of his solutions for the submarine's Escape Room, he created a panel with several voltmeters, using an Arduino Mega for that. That's when I thought: wouldn't it be possible to use the PCA 9685 to get the job done?
In the video below I use only three 5V voltmeters. But with just one module, you can use up to 16!
The connection is quite simple. It's just four wires. VCC, GND, SDA and SCL. In my example, I show how I connected my raspberry pi pico and also an Arduino UNO.

The code I used to test it with the Raspberry Pi Pico was this one (in Circuitpython). Don't forget to copy the adafruit_pca9685 library to your lib folder.
from board import SCL, SDA
import busio

# Import the PCA9685 module.
from adafruit_pca9685 import PCA9685

# Create the I2C bus interface.
i2c_bus = busio.I2C(SCL, SDA)

# Create a simple PCA9685 class instance.
pca = PCA9685(i2c_bus)

# Set the PWM frequency to 60hz.
pca.frequency = 60

vuOne = pca.channels[0]
vuTwo = pca.channels[1]
vuThree = pca.channels[2]

vuMeter = [vuOne, vuTwo, vuThree]

while True:
    for v in range (len (vuMeter)):
        for i in range(0, 0xffff, 20):
            vuMeter[v].duty_cycle = i

        # Decrease brightness:
        for i in range(0xffff, 0, -20):
            vuMeter[v].duty_cycle = i
For Arduino use, you can test with Adafruit_PWM_ServoDriver example:
/***************************************************
  This is an example for our Adafruit 16-channel PWM & Servo driver
  PWM test - this will drive 16 PWMs in a 'wave'

  Pick one up today in the adafruit shop!
  ------> http://www.adafruit.com/products/815

  These drivers use I2C to communicate, 2 pins are required to
  interface.

  Adafruit invests time and resources providing this open source code,
  please support Adafruit and open-source hardware by purchasing
  products from Adafruit!

  Written by Limor Fried/Ladyada for Adafruit Industries.
  BSD license, all text above must be included in any redistribution
 ****************************************************/

#include <Wire.h>
#include <Adafruit_PWMServoDriver.h>

// called this way, it uses the default address 0x40
Adafruit_PWMServoDriver pwm = Adafruit_PWMServoDriver();
// you can also call it with a different address you want
//Adafruit_PWMServoDriver pwm = Adafruit_PWMServoDriver(0x41);
// you can also call it with a different address and I2C interface
//Adafruit_PWMServoDriver pwm = Adafruit_PWMServoDriver(0x40, Wire);

void setup() {
  Serial.begin(9600);
  Serial.println("16 channel PWM test!");

  pwm.begin();
  /*
   * In theory the internal oscillator (clock) is 25MHz but it really isn't
   * that precise. You can 'calibrate' this by tweaking this number until
   * you get the PWM update frequency you're expecting!
   * The int.osc. for the PCA9685 chip is a range between about 23-27MHz and
   * is used for calculating things like writeMicroseconds()
   * Analog servos run at ~50 Hz updates, It is importaint to use an
   * oscilloscope in setting the int.osc frequency for the I2C PCA9685 chip.
   * 1) Attach the oscilloscope to one of the PWM signal pins and ground on
   *    the I2C PCA9685 chip you are setting the value for.
   * 2) Adjust setOscillatorFrequency() until the PWM update frequency is the
   *    expected value (50Hz for most ESCs)
   * Setting the value here is specific to each individual I2C PCA9685 chip and
   * affects the calculations for the PWM update frequency.
   * Failure to correctly set the int.osc value will cause unexpected PWM results
   */
  pwm.setOscillatorFrequency(27000000);
  pwm.setPWMFreq(60);  // This is the maximum PWM frequency

  // if you want to really speed stuff up, you can go into 'fast 400khz I2C' mode
  // some i2c devices dont like this so much so if you're sharing the bus, watch
  // out for this!
  Wire.setClock(400000);
}

void loop() {
  // Drive each PWM in a 'wave'
  for (uint16_t i=0; i<4096; i += 8) {
    for (uint8_t pwmnum=0; pwmnum < 16; pwmnum++) {
      pwm.setPWM(pwmnum, 0, (i + (4096/16)*pwmnum) % 4096 );
    }
#ifdef ESP8266
    yield();  // take a breather, required for ESP8266
#endif
  }
}
Don't forget to supply +5V and GND to the POWER pins of your PCA9685 module.

Simple Electronics to Escape Room Owners - Using a bunch of voltmeters with PCA9685


- Comments(0)
- Likes(0)
More by nicolaudosbrinquedos
-
 Homeassistant in Beaglebone Black With Debian 11
Intro: The primary objective of my project was to give some use to the Beaglebone Black that has bee...
Homeassistant in Beaglebone Black With Debian 11
Intro: The primary objective of my project was to give some use to the Beaglebone Black that has bee...
-
 The Adventures of Porting Circuitpython to Wio RP2040
I have been developing some electronic props solutions for Escape Rooms. And periodically I usually ...
The Adventures of Porting Circuitpython to Wio RP2040
I have been developing some electronic props solutions for Escape Rooms. And periodically I usually ...
-
 Simple Electronics to Escape Room Owners - Using a bunch of voltmeters with PCA9685
This is a preliminary study for an Escape Room game. My main goal was to add as many analog displays...
Simple Electronics to Escape Room Owners - Using a bunch of voltmeters with PCA9685
This is a preliminary study for an Escape Room game. My main goal was to add as many analog displays...
-
 Simple Electronics to Escape Room Owners - First Chapter
I've been developing puzzles and artifacts for Escape Room since 2018 and most of the time, I've bee...
Simple Electronics to Escape Room Owners - First Chapter
I've been developing puzzles and artifacts for Escape Room since 2018 and most of the time, I've bee...
-
 Finally! Animated Eyes using Seed Xiao RP2040
This is another advance in my studies to enable a more economically viable version for the Monster M...
Finally! Animated Eyes using Seed Xiao RP2040
This is another advance in my studies to enable a more economically viable version for the Monster M...
-
 Circuitpython on Seeed XIAO RP2040
Step 1: Unboxing... I2C Not Working?As soon as the card arrived, I installed the firmware version fo...
Circuitpython on Seeed XIAO RP2040
Step 1: Unboxing... I2C Not Working?As soon as the card arrived, I installed the firmware version fo...
-
 Raspberry Pi Pico with GC9A01 Round Display using Arduino IDE and TFT-eSPI Library
This is a work in progress for another one of the artifacts I used in Leonardo Cortez's "Strange Hou...
Raspberry Pi Pico with GC9A01 Round Display using Arduino IDE and TFT-eSPI Library
This is a work in progress for another one of the artifacts I used in Leonardo Cortez's "Strange Hou...
-
 Recreating an 80s TV with Raspberry Pi
Recently I built a series of special effects for the scenography of the play "Strange House" by Leon...
Recreating an 80s TV with Raspberry Pi
Recently I built a series of special effects for the scenography of the play "Strange House" by Leon...
-
 Talk to Me
This project is part of an extensive research on the use of animatronics and interactive objects tha...
Talk to Me
This project is part of an extensive research on the use of animatronics and interactive objects tha...
-
 Back in time! Make a Zoetrope using Arduino
I'm working on a series of animated objects for a children's play and decided to build a Zoetrope, t...
Back in time! Make a Zoetrope using Arduino
I'm working on a series of animated objects for a children's play and decided to build a Zoetrope, t...
-
 Alastor Moody Eye using Raspberry Pi Pico, CircuitPython and Round Display GC9A01
I am developing a series of objects for a children's play about fear and terror. And then I got insp...
Alastor Moody Eye using Raspberry Pi Pico, CircuitPython and Round Display GC9A01
I am developing a series of objects for a children's play about fear and terror. And then I got insp...
-
 The Crazy Pots Game
At some point on the internet I came across someone who had made a game like that, but unfortunately...
The Crazy Pots Game
At some point on the internet I came across someone who had made a game like that, but unfortunately...
-
 Arduino Mastermind Game
I created this little game as a hobby for my children during the Covid-19 quarantine. I had already ...
Arduino Mastermind Game
I created this little game as a hobby for my children during the Covid-19 quarantine. I had already ...
-
 Raspberry Pi Pico With I2C Oled Display and CircuitPython
This is my first experience using this little board from Raspberry Pi Foundation.I preferred to inst...
Raspberry Pi Pico With I2C Oled Display and CircuitPython
This is my first experience using this little board from Raspberry Pi Foundation.I preferred to inst...
-
 Raspberry Pi Pico and TFT ILI9341 with Circuit Python
I decided to write another tutorial on the Raspberry Pi Pico, mainly because the card is very recent...
Raspberry Pi Pico and TFT ILI9341 with Circuit Python
I decided to write another tutorial on the Raspberry Pi Pico, mainly because the card is very recent...
-
 Arduino Minesweeeper
It was then that I found the works of Rachit Belwariar, on the page https://www.geeksforgeeks.org/cp...
Arduino Minesweeeper
It was then that I found the works of Rachit Belwariar, on the page https://www.geeksforgeeks.org/cp...
-
Open Source Very Large Stick - Freejoy & MMjoy2 breakout board
456 0 0 -
RF Control training board for students based on ESP32 C3
604 0 2 -
-
KINETIC COASTERS with a TWIST! Laser or 3D Print some DIY Magic
569 0 1 -
RPI - 8 IO PLC With ATTiny85 Watch Dog
490 0 1 -
Nintendo Famicom HVC-001 Controller Shells
592 0 1 -
COMMODORE 128 DIAGNOSTIC REV.785260 KEYBOARD DONGLE
550 0 4 -
COMMODORE 128 15KHz DISPLAY ADAPTER (C128 80 COLUMN ADAPTER)
747 1 5 -


